The 15-Minute Garage Door Tune-Up to Do Twice a Year
Fifteen minutes, twice a year. That is the whole job. This is the exact routine, timed step by step, that catches small problems while they are still cheap.
The best tune-up story I know ends with a problem nobody had to pay emergency prices for. A homeowner ran his spring check on a Saturday morning, the same routine in this guide, and spotted something odd on the left lift cable. A few strands had frayed where the cable met the drum. The door still worked perfectly. Nothing sounded wrong. Nothing looked broken unless you were standing there looking for it.
He called it in as a question, not an emergency. A technician swapped both cables on a calm weekday visit, with the car safely out of the garage. Compare that with the other version of this story, the one where the cable lets go on a January night with the door halfway down and the car trapped inside. Same cable. Same fix. Completely different bill and a completely different week. Fifteen minutes of looking, twice a year, is what separates those two stories.
A frayed cable is a pro job — see our garage door cable repair in Rochester, NY.
The 15 minutes at a glance
- Minutes 0–3: balance test with the opener disconnected.
- Minutes 3–5: safety reversal test with a 2×4, plus a sensor lens wipe.
- Minutes 5–8: snug the track bolts and hinge screws.
- Minutes 8–11: lubricate hinges, roller stems, and spring coils.
- Minutes 11–13: weather seal and track check.
- Minutes 13–15: look, listen, and note anything odd for next time.
What Do I Need Before I Start the Clock?
Almost nothing, and that is the point. Grab a socket wrench or nut driver, a can of silicone-based spray lubricant or white lithium grease, a soft dry rag, a scrap piece of 2×4 lumber, and your phone for its flashlight. A step stool helps you see the spring and drums above the door. That is the entire kit.
Pick your two dates now and treat them like oil changes. Early fall, before the cold makes everything stiff and brittle. Early spring, after a winter of salt, slush, and freeze-thaw cycles. Doors fail at the extremes of the year, so the checks belong just before them.
How Do I Run the Balance Test in the First Three Minutes?
Close the door, then pull the red emergency release cord hanging from the opener rail. That disconnects the motor so you can move the door by hand. Lift it about halfway and let go carefully, keeping your hands ready.
A balanced door stays where you leave it, drifting no more than a few inches. If it slides down slowly, the springs are losing tension. If it shoots up, they are wound too tight. If it slams down or feels impossibly heavy, stop right there. That is a spring problem, and springs are on the never-touch list at the end of this guide. A door that passes the balance test is a door whose opener only has to guide, not dead-lift, and that is what makes openers last.
A door that drifts down has weak springs — see our garage door spring repair in Rochester, NY.
How Do I Test the Safety Reversal With a 2×4?
Lay the 2×4 flat on the ground in the center of the doorway, reconnect the opener, and close the door with the remote. When the door touches the wood, it should reverse within about two seconds and head back up. That test proves the opener senses resistance and backs off, the feature that protects kids, pets, and car bumpers.
While you are down there, wipe both photo-eye sensor lenses with the soft dry rag. Dust and cobwebs weaken the beam and cause phantom reversals. DASMA, the industry trade association, treats these sensors as core safety equipment, not optional extras. If the lights blink or the door reverses with nothing in the way, work through the full sensor troubleshooting walkthrough before assuming the opener is dying.
Which Bolts Do I Snug, and How Tight Is Too Tight?
Work around the door with your wrench: the bolts holding the track brackets to the wall, the screws on each hinge, and the nuts on the opener mounting straps. Thousands of cycles vibrate all of them loose a fraction at a time, and loose hardware is where rattles and wobbles begin.
Tight means firmly seated, not forced. If you crank a bolt until the threads complain, you can strip it or pull a track out of alignment, and a misaligned track does real damage. Snug each fastener, move on, and never touch the bolts on the bottom brackets or anything attached to a cable or spring. Those fasteners hold back tension, and they belong to the last section of this guide.
Where Does Lubricant Go, and Where Does It Never Go?
Spray the hinge pivots where each door section flexes. Spray the roller stems and bearings. Run a light coat along the spring coils above the door, and finish with the lock bar and the opener arm pivot. Short bursts, light film, wipe the drips. Then cycle the door a few times to spread it.
Never lubricate the tracks. Rollers are built to roll in a clean, dry channel, and grease in the track collects grit that grinds everything it touches. And leave the blue-and-yellow can on the shelf entirely. It is a solvent, not a lubricant, and the full story is in why WD-40 is the wrong spray for a garage door. Clopay’s lubrication guide backs the same points and the same warning.
How Do I Check the Weather Seal and the Tracks?
In daylight, close the door and stand inside the dark garage. Light leaking along the bottom or sides marks gaps where the rubber astragal has cracked, flattened, or pulled away. Run your fingers along the seal. It should feel flexible, not brittle or torn.
A failed seal lets in water that freezes the door to the concrete in winter, plus mice and melting snow all year. Wipe the tracks clean with your rag while you look, and check them for dents or bent sections. Replacing a bottom seal is a cheap afternoon job. Ignoring it until the door freezes shut is how a fifteen-minute routine turns into a service call.
What Do I Never Touch, No Matter What I Find?
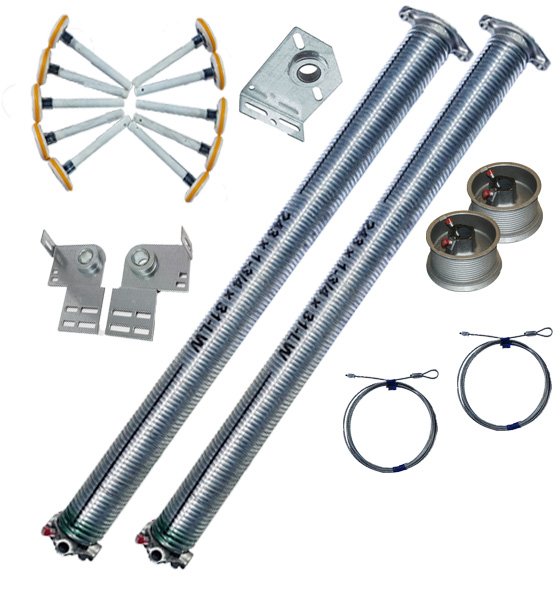
Three things: the springs, the lift cables, and the bottom brackets. The springs store enough wound energy to break bones. The cables carry that load to the door. The bottom brackets bolt the cables to the door under full tension. Winding bars, set screws, and cable drums live in the same category. Look at all of them closely during your fifteen minutes. Touch none of them.
If your inspection finds frayed cables, a gap in a spring coil, or rust eating a bracket, that job belongs to our garage door repair team in Rochester, NY. A proper visit follows the same five-step process, with the door clamped and tension released in controlled quarter turns. Knowing where your skills end is not a weakness. It is why smart homeowners stay safe around the largest moving machine in the house.
Tune-Up Questions, Answered
What homeowners ask once the timer is running.
Early fall and early spring. The fall check prepares the door for cold, when lubricant thickens, steel contracts, and tired springs are most likely to let go. The spring check catches whatever winter did: salt corrosion on cables, a cracked bottom seal, hardware loosened by months of freeze and thaw. Fifteen minutes twice a year puts the inspection just before the two seasons when doors work hardest and fail most often. Put both dates in your phone as recurring reminders so the routine survives busy years.
A door that drifts down slowly has springs losing tension, and one that slams down or feels extremely heavy likely has a broken or badly weakened spring. Stop using the opener, because forcing it to lift dead weight strips its drive gear and can bend the top panel. Do not adjust the springs yourself, since they are wound under serious tension. Book a technician visit instead. Spring work at the tune-up stage is a planned, fairly priced job. The same spring failing at midnight is a call you did not plan.
Stop running the door and treat it as a safety fault, not a quirk. First confirm the 2×4 lay flat in the center of the doorway and try once more. If the door presses down and keeps pushing, the force settings or the opener’s safety system need attention. Check that both sensor lenses are clean and glowing steady, since a blind photo-eye can also cause strange behavior. If everything looks right and it still fails, keep the door closed and call a technician. A door that will not reverse is not safe around kids or pets.
Force or safety problems need a pro — see our garage door opener repair in Rochester, NY.
Wait and buy the right can instead. The original WD-40 is a solvent and water displacer, not a lasting lubricant. It washes out the grease your hinges and bearings need, evaporates within days, and leaves a film that traps dust against the metal. One spray will not destroy anything, but it starts the squeak returning louder. A silicone-based spray or white lithium grease costs about the same and actually stays slippery under load. The tune-up takes fifteen minutes. It deserves fifteen dollars of the correct spray.
With the door closed and your phone flashlight on, look at both cables where they wrap onto the drums above the door and where they meet the bottom brackets. Healthy cable is smooth and even. Trouble looks like broken strands sticking out like whiskers, rust-colored fuzz, kinks, or a section that looks thinner than the rest. Fraying starts small and accelerates, because the remaining strands carry extra load. Never trim the whiskers or touch the cable. Photograph it and book a replacement while the door still works.
No. Wipe the tracks clean with a damp rag and leave them dry. Rollers are designed to roll inside the track channel, not slide on a layer of grease. Lubricant in the channel collects dust and grit, and that paste grinds the rollers and track with every cycle. The noise and wear people blame on dry tracks is almost always dry roller bearings or hinge pins instead. Lubricate those parts, keep the channel clean, and the door runs smoother and quieter for it.
A technician covers your whole checklist, then goes past the never-touch line safely. That means inspecting spring tension and adjusting it in quarter turns, examining cables and drums under controlled conditions, checking bearing plates, setting opener force and travel limits, and testing the full safety system. The visit ends with the door balanced and verified, not just looked at. Your fifteen-minute routine is the early warning system between those visits. It catches the fray, the drift, and the rattle while a pro visit is still cheap and calm.
Quality rollers with sealed bearings are commonly rated around 10,000 cycles, roughly 7 to 10 years on a typical door, and regular lubrication helps them reach that rating instead of grinding out early. Hinges last longer still when their pins stay lubricated and their screws stay snug. Nothing on a door lasts forever, but a twice-yearly routine stretches every part toward the top of its range. The real win is predictability. Parts get replaced on your schedule, in daylight, instead of failing on the coldest night of the year.
The Bottom Line
The routine works because it builds a baseline. After two or three rounds, you know exactly how your door should sound, feel, and drift, so the first wrong note stands out immediately. That familiarity is worth more than any single check on the list.
When your fifteen minutes finds something on the never-touch list, do not negotiate with it. You can see everything we fix on the homepage and make one call while the door still opens, closes, and behaves. That is the entire philosophy of the tune-up: small looks, early calls, no emergencies.
Checklist Found Something Scary?
Frayed cable, heavy door, failed safety test. Those are same-week problems, not next-season ones. Get them handled while the door still opens.
Call (866) 727-0060